Twine Peaks Storm Shield Defense 2 Guide
Twine Peaks Storm Shield Defense 2 is the next permanent Homebase defense at this stage of Twine Peaks, and it is much easier when you treat the Storm Shield as a base you are improving for later SSDs rather than a disposable mission fort. Before pressing Expand Shield, repair the whole active network, restock building materials and make sure the new objective or amplifier has a controlled route for Husks instead of several open approaches.
This Twine Peaks Storm Shield Defense 2 guide gives you a practical build order, the progression change that matters at this exact stage, a solo plan and a checklist for diagnosing a failed run. The permanent Storm Shield layout can vary because amplifier choices affect later attack directions, so the useful strategy is to read terrain and pathing rather than pretend every account has an identical spawn map.
Twine Peaks Storm Shield Defense 2: what changes at this stage
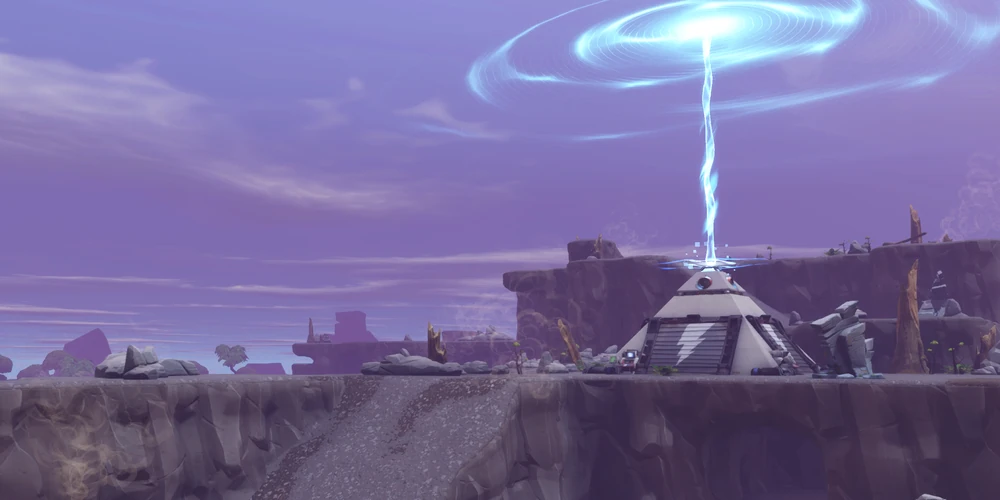
Twine Peaks Storm Shield Defense 2 Image Epic Games.
The specific progression job in Twine Peaks Storm Shield Defense 2 is to make the first Twine Peaks amplifier expansion. That matters because the new or expanded objective changes which terrain and older fortifications are exposed to pressure. Do a full walkaround before starting and look for ramps, cliff edges, natural choke points and short routes that could let Husks reach an amplifier without entering your intended trap lane.
Completing Twine Peaks Storm Shield Defense 2 awards Truck expedition slot 4 and Close Assault Squad slots 4 to 6. It also opens the next Twine Peaks quest section. Those unlocks are worth checking immediately after the defense, especially when the SSD changes evolution access, Survivor Squad capacity or the next region of progression.
How to complete Twine Peaks Storm Shield Defense 2
- Load into your Storm Shield privately first so you can inspect the map without a countdown or random teammates changing structures.
- Repair every active objective shell and upgrade weak walls, floors and roofs before placing more traps.
- Prepare for the defining change in this stage: make the first Twine Peaks amplifier expansion.
- Choose one obvious Husks route on each likely approach and funnel enemies into it. Do not wall off every path, because that encourages random structure breaking.
- Place control first, then damage. Floor Freeze, Wooden Floor Spikes, Wall Launchers or Tar Pits can keep enemies in range of ceiling and wall damage much longer.
- Add roof protection and anti-air coverage where Lobbers, Flingers or thrown projectiles can reach the objective from outside the main tunnel.
- Start Expand Shield only when you have replacement traps, ammunition and enough building materials to repair between waves.
- During each attack, let the trapped route handle normal Husks while you focus on Smashers, Flingers, Takers and anything that bypasses the lane.
- Use the downtime between waves to repair the exact lane that was hit, then move early to the next active objective.
- After the clear, confirm that the next Twine Peaks quest section is available before leaving Homebase.
The build I would use before pressing Expand Shield
Use the new amplifier to establish a repeatable building standard: upgraded shell, anti-air coverage where projectiles are a problem, one clear Husks route, and enough open space for you to shoot Mist Monsters without breaking pathing.
- Objective shell: fully upgraded walls around the target, a closed roof and no accidental door or edit that gives Husks a clean shortcut.
- First control tile: slow, freeze or launch enemies before the main damage section instead of wasting all damage at the very first tile.
- Damage section: combine ceiling and wall traps so one trap slot failing does not leave the lane harmless.
- Smasher stop: keep a Tar Pit, strong burst weapon or hero ability available close enough to the objective to stop a charge that survives the tunnel.
- Lobber protection: extend roofing or angled protection far enough that enemies cannot simply throw over the front of the fort.
- Player route: give yourself a fast way between objectives that does not also become the easiest route for Husks.
How to solo Twine Peaks Storm Shield Defense 2
Soloing Twine Peaks Storm Shield Defense 2 is mostly a preparation problem. A Constructor with B.A.S.E. is useful because the defense depends on permanent structures, but any class can clear it if the traps and objective shell are doing enough work. Craft ammunition before launch, keep one dependable Mist Monster weapon ready, and avoid chasing enemies so far outside the tunnel that a second group reaches the objective behind you.
The key solo test for Twine Peaks Storm Shield Defense 2 is whether one lane can hold for several seconds without you. If every normal Husk requires manual shooting, the trap route is too weak or the path is wrong. Improve the lane before retrying instead of simply bringing more ammo. That becomes increasingly important in late Canny and Twine where one Smasher or Flinger can exploit a weak side while you are busy elsewhere.
What to do if the defense keeps failing
- If Husks attack random walls, open a clearer route through the trapped lane and remove blockoffs that are making pathfinding unpredictable.
- If Smashers reach the objective, add control near the end of the tunnel and save burst damage for them instead of firing into every normal Husk.
- If Lobbers or Flingers are the problem, extend the roof or place anti-air coverage instead of adding more floor damage.
- If traps expire before the wave ends, improve durability, move damage deeper into the lane or replace low-durability schematics before the next attempt.
- If you cannot rotate quickly enough, build safer player movement between objectives and stop overbuilding walls that block your own route.
When Twine Peaks Storm Shield Defense 2 fails, note the exact objective, wall and enemy type that caused the collapse. Repair that specific problem before touching unrelated parts of the base. Storm Shield progression gets expensive when every failed run turns into a complete rebuild, and most failures can be traced to one bad path, one uncovered roof or one objective with weaker traps than the others.
What Twine Peaks Storm Shield Defense 2 unlocks
After Twine Peaks Storm Shield Defense 2 is complete, the important next step is the next Twine Peaks quest section. The major reward at this stage is Truck expedition slot 4 and Close Assault Squad slots 4 to 6. Keep the permanent base intact because the same Homebase map is reused for later SSDs, Wargames and eventually Endurance.
You can also use Epic’s official Fortnite Save the World page for current mode and platform information. For Twine Peaks Storm Shield Defense 2 itself, the practical rule is simple: read the terrain, force a clean route, protect the objective from ranged pressure and make the base strong enough that you are free to deal with the enemies traps cannot reliably stop.
For Twine Peaks Storm Shield Defense 2, use the failed wave as information. The objective that took damage, the enemy that caused it and the route Husks actually followed tell you exactly what to reinforce before the next attempt.
For Twine Peaks Storm Shield Defense 2, use the failed wave as information. The objective that took damage, the enemy that caused it and the route Husks actually followed tell you exactly what to reinforce before the next attempt.
For Twine Peaks Storm Shield Defense 2, use the failed wave as information. The objective that took damage, the enemy that caused it and the route Husks actually followed tell you exactly what to reinforce before the next attempt.